The little things that make me happy here on Bliss Road~~Emily Keaton
Showing posts with label blog candy. Show all posts
Thursday, August 14, 2014
Guest Designer for Top Dog Dies
Hello, friends! On my last post, "A little about me . . . ", I mentioned that I'd be back soon with an all-crafting post for a guest designer gig that I was super excited about. Well, the time has come!! I was absolutely thrilled when I was contacted a few months ago by Top Dog Dies, asking me if I'd be interested in guest designing for them. Boy, was I!!! Not familiar with Top Dog? Here's a little about them:
Top Dog Dies is a new online store that offers their own brand of wafer-thin and steel-rule dies, along with dies from brands you already know and trust, including Little B, Lawn Fawn, Taylored Expressions, Savvy Stamps and Cheery Lynn Designs. Top Dog Dies is also the leading U.S. retailer for Tattered Lace, a new line of intricate dies designed by British designer Stephanie Weightman.
The wonderful folks at Top Dog Dies sent me three fantastic die sets to play with--Top Dog Dies Birds & Nest, Top Dog Dies Vintage Alphabet, and Top Dog Dies Tag Album--and I couldn’t wait to get started with them.
I made three Top Dog Dies projects in all, and you'll find the first two over on the Top Dog blog today. One is a set of note cards and the other is a masculine birthday card. I hope you'll go and check them out!
My third project is a gift tag that I made to coordinate with a lovely box I picked up (on clearance!) at IKEA recently. I thought it would make the perfect gift box! I used the smaller tag from the Top Dog Dies Tag Album set and diecut letters from the Top Dog Dies Vintage Alphabet set to personalize it. The apple stamp and sentiment come from Unity's to the core! Itty Bitty stamp set.
Perfect for Mom's next birthday, don't you think?
And now, how about a giveaway?
Top Dog Dies is doing a guest designer giveaway for the whole month of August! The winner will receive $50 worth of exclusive wafer-thin dies of their choice from Top Dog Dies. Enter HERE! Deadline to enter will be Sunday, August 31, 2014, at midnight Central Standard Time.
Thank you so much for dropping by to visit me today. Don't forget to visit the Top Dog Dies blog today to see my other Top Dog projects AND enter the Guest Designer Giveaway!!
Have a day filled with bliss!
Emily
Labels:
blog candy,
CAS,
fruit,
gift ideas,
guest designer,
love,
tags,
Unity,
washi tape
Monday, June 23, 2014
Embossed Elements: Cloudy Sky + a GIVEAWAY
Hi, everybody! I'm coming to you today with the June edition of my monthly Embossed Elements feature for the DeNami blog. Today I'm featuring a truly versatile item: the Cloudy Sky Embossing Folder from the DeNami store. There are just so many different ways to use this awesome design!
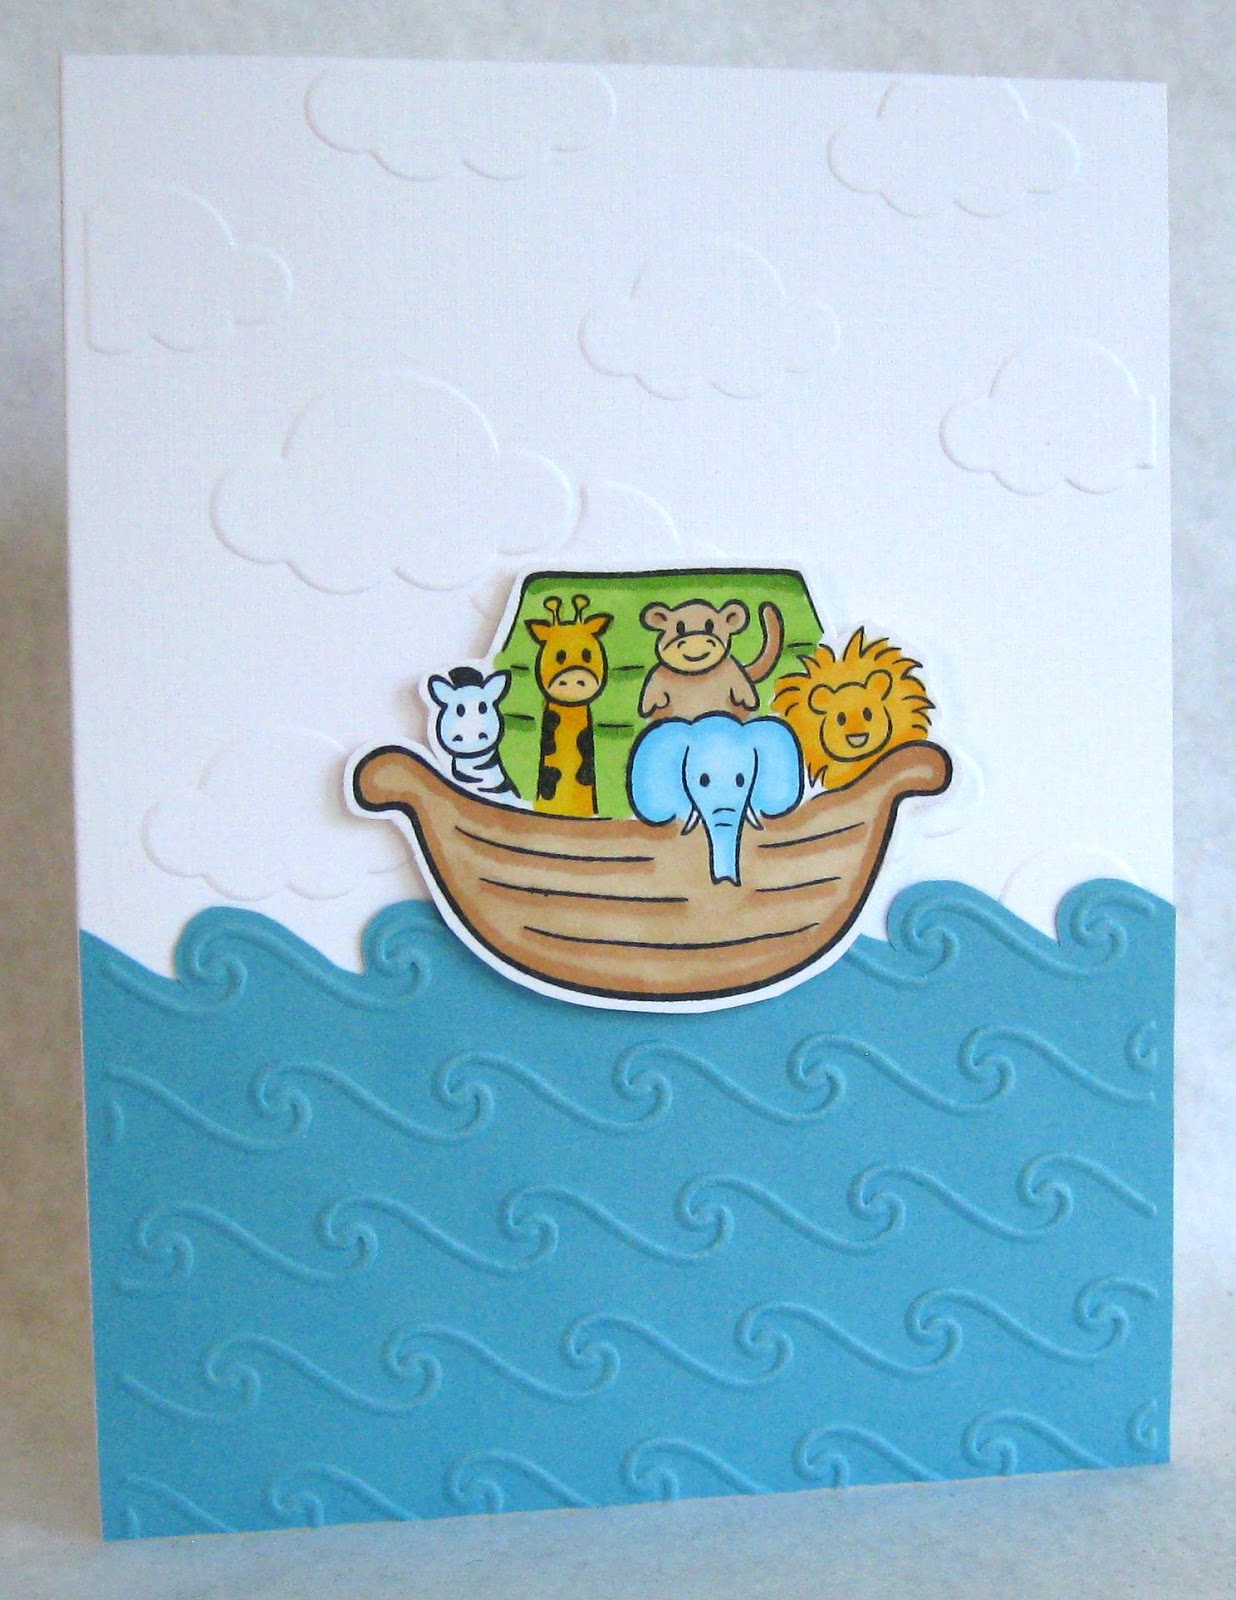
My first card is a sweet all-purpose card. It uses just one DeNami stamp (Noah's Ark), and two embossing folders: Cloudy Sky and Beach Waves. I think this would be so cute as a baby card, a baby's first birthday card, or even a thank you note for a Sunday School teacher!
My second card is perfect for the 4th of July! I again used the Cloudy Sky embossing folder as a backdrop, this time for an outdoor celebratory scene featuring Chickie in Balloon, Chickie w/ Sparkler, and Patriotic Chickie. The sentiment comes from the Everyday Greetings stamp set.
I hope this gives you some ideas you can use with the Cloudy Sky embossing folder! Thanks for taking a peek at my embossed projects today. Be sure to check out my giveaway!
How would you like the chance to win this Cloudy Sky Embossing Folder? I have one up for grabs in an Embossed Elements giveaway! Want to be in the running? Just leave me a comment on this post using the word "CLOUDS." There's no need to be a follower of my blog to enter, but if you are a follower (or become a new follower!), you can have a second entry in the drawing--just leave me a second comment telling me that you are a follower and how you follow. :)
I'll leave commenting open until 11:59 p.m. EST on Wednesday, June 25, 2014, and will draw one commenter at random. The winner will be announced right here on my blog on Thursday, June 26, and if I'm able to find an email address, I'll be sure to contact the winner as well.
Thanks for joining me today!
Emily
Labels:
animals,
baby,
blog candy,
cheers,
Copics,
DeNami Design,
Embossed Elements,
embossing,
patriotic
Monday, May 26, 2014
Embossed Elements: Father's Day + a Giveaway
Greetings, friends! I'm here today with the May edition of my monthly Embossed Elements feature on the DeNami Design blog. Today I'm preparing for Father's Day with a pair of cards featuring the very cool Diamond Plate Embossing Folder from the DeNami store. It's perfect for those sometimes hard-to-create masculine cards!
My first card is a clean and simple one for Dad's Day. It uses just two DeNami stamps (Dad and Solid Block Border), two colors of ink (Habanero and Deep Lagoon), and two colors of cardstock. I used the Diamond Plate EF to emboss punched squares of cardstock. I love the bold, graphic look of this design. So easy to put together, too!
My second card is a little more involved, but really not too much more. And oddly enough, it has basically the same sketch as the first one! That was totally unplanned, but there you have it ;). For this one I used the Diamond Plate EF to emboss a panel of vellum as a background for my card. I diecut a few gear shapes (perfect for a guy card, right?) that go with that diamond plate background perfectly. Once again I used just two DeNami stamps in my design (Happy Father's Day and Stitched Rectangle) and two ink colors (Satin Red and Onyx Black). This design is perfect for any mechanically inclined dads!!
Thanks for taking a peek at my embossed Father's Day cards today. Be sure to take a peek below at my giveaway!
How would you like the chance to win this Diamond Plate Embossing Folder? I have one up for grabs in an Embossed Elements giveaway! Want to be in the running? Just leave me a comment on this post using the word "GUYS." There's no need to be a follower of my blog to enter, but if you are a follower (or become a new follower!), you can have a second entry in the drawing--just leave me a second comment telling me that you are a follower and how you follow. :)
I'll leave commenting open until 11:59 p.m. EST on Wednesday, May 28, 2014, and will draw one commenter at random. The winner will be announced right here on my blog on Thursday, May 29, and if I'm able to find an email address, I'll be sure to contact the winner as well.
Thanks for joining me today!
Emily
Labels:
blog candy,
CAS,
contest,
Embossed Elements,
embossing,
Father's Day,
masculine
Monday, April 28, 2014
Embossed Elements: GRADUATION + a Giveaway!
Greetings, friends! I'm here today with the April edition of my monthly Embossed Elements feature for the DeNami Design blog. Today I'm gearing up for graduation season with two different cards using fun embossing folders from the DeNami store.
My first project features the oh-so-festive Graduation Hat Embossing Folder. I used it (along with Congratulations Circle and the diploma and mortarboard stamps from the cling Graduation Set) to make a congratulatory card for the new graduate.
I chose the colors of my daughter's high school (including some fabulous DeNami Leaf Green cardstock for the embossed panel and the paper-pieced mortarboard) for this creation and went with a design that really shows off that awesome embossed sea of graduation caps. Doesn't it look like a crowd of grads has just tossed their mortarboards into the air at the end of the commencement ceremony? That image always makes me smile :). Not only is this embossing folder super for graduation cards, but it would also be perfect for making graduation invitations or graduation thank you notes.
I don't find myself needing graduation cards all that often (although as my kids progress further through school, I imagine that will begin to change!), so I was reluctant at first to invest in purely graduation-themed products. Just in case you find yourself in a similar situation, I wanted to show you another option for a fun graduation card using non-graduation-specific products. This project features the Bunting Embossing Folder.
After embossing my white card base with the Bunting EF, I embossed several scraps of patterned paper (once again choosing a color scheme inspired by my daughter's high school) and then paper-pieced each of the pennants. I love how it turned out! I completed my clean and simple design with a loopy bow tied in baker's twine from the Spring Twine 3-pack and a stamped Small Congratulations sentiment.
I love the festive look that the embossed pennant banner gives this congratulations card. It's so easy to personalize the bunting with the recipient's school colors. But I can also think of all kinds of other occasions--not just graduations!--that this embossing folder would be perfect for: birthday, baby, weddings, anniversaries, Independence Day, New Year's, . . . the list could go on and on!!
Thanks for taking a peek at my embossed graduation projects today. I hope I was able to inspire you!
How would you like the chance to win this Graduation Hat Embossing Folder? I have one up for grabs in an Embossed Elements giveaway! Want to be in the running? Just leave me a comment on this post using the word "MORTARBOARD." There's no need to be a follower of my blog to enter, but if you are a follower (or become a new follower!), you can have a second entry in the drawing--just leave me a second comment telling me that you are a follower and how you follow. :)
I'll leave commenting open until 11:59 p.m. EST on Wednesday, April 30, 2014, and will draw one commenter at random. The winner will be announced right here on my blog on Thursday, May 1, and if I'm able to find an email address, I'll be sure to contact the winner as well.
Thanks for joining me today!
Emily
Monday, March 24, 2014
Embossed Elements: BASKET WEAVE + a Giveaway!
Happy Monday to you, DeNami fans! I'm here today with the March edition of my monthly Embossed Elements feature for the DeNami Design blog. Today I'm sharing with you two different projects featuring the oh-so-appropriate-for-Easter Basket Weave Embossing Folder from the DeNami store. Shall we take a peek at a few fun ways to use it?
First, I couldn't wait to try adding some realistic basket-weave texture to DeNami's Large Spring Basket stamp!
For this project, I stamped the basket on Iridescent Aquamarine cardstock in Jet Black Staz-On ink. After trimming out the basket, I embossed it with the Basket Weave embossing folder. When I glued down the basket to my card, I was careful to leave the scalloped top edge of the basket free of glue so I could easily slip in some brightly colored Easter eggs (trimmed from the Solid Egg Border stamped in Pearlescent Orchid Brilliance ink, Pearlescent Purple Brilliance ink, and Pearlescent Sky Blue Brilliance ink) and a {yummy!} little chocolate bunny (a trimmed-out, white-embossed version of the bunny from the Cuddly Pals stamp set). I rounded out this card with the beautifully scripted Small Happy Easter sentiment.
For my second project, I used the Basket Weave Embossing Folder as my background.
In this project, I used the debossed side of my cheery yellow panel. Don't you just love how richly detailed the weave pattern is? I know I do! With that basket-weave pattern and the Easter-Peeps-bright pinks, yellows, and purples, it's obvious that this card celebrates Easter! Here are the DeNami stamps that I used for this creation: Whimsical Garden Set, Summer Flowers Set, and Easter Blessings. I also used some gorgeous lavender cardstock and added those sweetly bright pearl accents with Crystal Lacquer pearl pens (I used this set and this set).
Once I got thinking about ways to use this lovely Basket Weave Embossing Folder, I just couldn't turn off the ideas! Wouldn't Easter Chickie or Chickie Easter Basket look marvelous with this embossing folder? Or how about "Hoppy" Easter Chickies? And just to show that basket weave isn't just for Easter, why not try pairing it with the gorgeous Apple Basket for autumn or hot-air Chickie in Balloon for summer? I think there are just so many possibilities :D.
Well, I hope that I've given you some useful ideas for embossing with this installment of Embossed Elements!
How would you like the chance to win this gorgeous Basket Weave Embossing Folder? I have one up for grabs in an Embossed Elements giveaway! Want to be in the running? Just leave me a comment on this post using the word "SPRING." There's no need to be a follower of my blog to enter, but if you are a follower (or become a new follower!), you can have a second entry in the drawing--just leave me a second comment telling me that you are a follower and how you follow. :)
I'll leave commenting open until 11:59 p.m. EST on Wednesday, March 26, 2014, and will draw one commenter at random. The winner will be announced right here on my blog on Thursday, March 27, and if I'm able to find an email address, I'll be sure to contact the winner as well.
Thanks for joining me today!
Emily
Labels:
blog candy,
chocolate,
Copics,
DeNami Design,
Easter,
eggs,
Embossed Elements,
embossing,
flowers,
garden,
spring
Monday, February 24, 2014
Embossed Elements: SHAMROCKS + a Giveaway!
Hello, hello, friends! I'm here today with the February edition of my new monthly Embossed Elements feature for the DeNami Design blog. Today I'm sharing with you two different projects featuring the very cool St. Patrick Embossing Folder from the DeNami store. My first project takes the obvious route, casting the St. Patrick embossing folder as the star of a St. Patrick's Day card:
For this project, I trimmed three identically sized panels of cardstock (1.75" x 4") in Leaf Green, White, and Desert Orange, then carefully lined them up side-by-side in the St. Patrick embossing folder before running the whole shebang through my diecutting machine. I adhered the panels to a white cardstock card base to form a beautifully textured version of the Irish flag.
Next I stamped a Stitched Rectangle in Tuxedo Black Memento ink on white cardstock and filled this frame with Happy St. Patrick's Day (don't you just LOVE how a shamrock is used as the apostrophe in this sentiment? I do!) in Fresh Green Versacolor ink. After trimming out the framed sentiment, I simply popped it up on foam tape, and my simple flag-waving card was complete!
My second card goes to show that this St. Patrick embossing folder isn't just for March 17! Here I've used it to create a clean and simple Good Luck card.
I used the St. Patrick embossing folder to deboss a panel of patterned paper for a bit of subtly lucky texture and then adhered it, along with a length of narrow celery green grosgrain ribbon, to a white card base. I stamped the brand-new Good Luck sentiment in Olympia Green Versafine ink on white cardstock before punching it out with a word label punch. I popped up the sentiment with foam tape and affixed a pair of green rhinestones. Finally, I stamped a Curly Shamrock in Tuxedo Black Memento ink on white cardstock, colored it with my Copic markers, trimmed it out, and adhered it with some foam tape. Done!
I hope that this installment of Embossed Elements has given you some useful ideas for using embossing in your papercrafting!
How would you like the chance to win this beautiful St. Patrick Embossing Folder? I have one up for grabs in an Embossed Elements giveaway! Want to be in the running? Just leave me a comment on this post using the word "LUCKY." There's no need to be a follower of my blog to enter, but if you are a follower (or become a new follower!), you can have a second entry in the drawing--just leave me a second comment telling me that you are a follower and how you follow. :)
I'll leave commenting open until 11:59 p.m. EST on Wednesday, February 26, 2014, and will draw one commenter at random. The winner will be announced right here on my blog on Thursday, February 27, and if I'm able to find an email address, I'll be sure to contact the winner as well.
Thanks for joining me today!
Emily
Labels:
blog candy,
CAS,
Copics,
DeNami Design,
elegant,
Embossed Elements,
embossing,
good luck,
leaves,
monochromatic,
spring,
St. Patrick's Day
Monday, January 27, 2014
My Brand-New DeNami Feature: EMBOSSED ELEMENTS + a GIVEAWAY
Hi there, everyone! I'm here today with the very first installment of my new regular monthly feature for the DeNami Design blog. With today's post I'm starting a series called Embossed Elements that highlights all of the wonderful new embossing folders being carried in the DeNami Design store. If you haven't checked these out yet, you should! You won't believe all of the variety in this collection: the DeNami store carries an amazing 142 different embossing folder designs!!
Now, I do have a confession to make. While I've been papercrafting for nearly 10 years now, I've only just acquired my very first diecutting machine (thank you, Santa!!). So for the first time ever, I'm able to dabble with embossing folders! I wasn't completely sure that embossing folders would be for me, but in the short time that I've been playing with the embossing folders that DeNami carries, I've become completely addicted to them! I love the fabulous texture that they add to my creations--everything is so crisp, and the designs are deep. They really stand out! And I can't believe how much visitors to my blog comment on the embossing I've been featuring on projects I've posted there lately. It must be really noticeable!!
So whether you are brand new to embossing folders like me, or an old pro, I'm hoping that my Embossed Elements feature will help you learn your way around DeNami's new collection of embossing folders--and maybe even give you some new ways to use or think about embossing!
Today I'm sharing with you two different projects for Valentine's Day, and both feature the very festive Layered Hearts Embossing Folder from the DeNami store. One thing I really love about this embossing folder is that, while many of the embossing folders in DeNami's collection are clearly designed for the portrait orientation, this one is perfect for the the landscape orientation. Let's take a look:
For this first project, I started with a panel of red cardstock and punched the bottom edge using the EK Success Deco Scallop border punch and then ran it through my Big Shot in the Layered Hearts Embossing Folder. I matted this embossed layer with white cardstock and then mounted the whole enchilada on a pink card base.
Next I added a pink cardstock panel that I had embossed with another Valentine gem from the DeNami embossing folder collection: the Heart Embossing Folder. I really like the look of both of these embossed patterns layered on top of one another!
I stamped the Elegant Word Plate on white cardstock with Onyx Black Versafine Ink, and used my Stamp-a-ma-jig to align the pretty Sending You Love sentiment, stamped in Satin Red Versafine Ink, right smack dab in the middle. I decided to glam up my focal point just a bit with some gorgeous Ruby Red Sparklets Glitter adhered inside the loops of the word plate with a Quickie Glue Pen. A quick fussy cut was all I needed to get this ready for attaching to my card. I finished off my design with a simple red grosgrain bow.
My second card is a reminder that embossing folders are perfect for adding texture not only to rectangular panels, but also any precut shape you care to pretty up!
For this card, I started with a pink heart diecut, embossed it with the Layered Hearts Embossing Folder, and layered it on a heart-shaped card base die cut from red cardstock with a larger nested heart die.
Next I built my very own cupid's arrow embellishment with a wooden craft stick, a wooden veneer heart shape, and some bits of chipboard. I colored the wood bits red using a Faber-Castell Gelato and rubbed the color into the woodgrain with my fingertips. I trimmed angled fringe into two bits of chipboard to make the arrow's feathery fletching and colored them with a white Gelato. After gluing all the bits together to form my arrow, I outlined the heart-shaped arrowhead with dimensional dots drawn on with a white Crystal Lacquer Pearl Pen.
Finally, I stamped the Love Flourish sentiment on white cardstock with Tuxedo Black Memento ink, trimmed out the sentiment, colored in the heart-shaped O with a red Copic marker, and adhered it to the card with some foam tape. Done!
I hope that this opening installment of Embossed Elements has given you some ideas for using embossing on your Valentine cards!
How would you like the chance to win this beautiful Layered Hearts Embossing Folder? I have one up for grabs in an Embossed Elements giveaway! Want to be in the running? Just leave me a comment on this post using the word "HEART." There's no need to be a follower of my blog to enter, but if you are a follower (or become a new follower!), you can have a second entry in the drawing--just leave me a second comment telling me that you are a follower and how you follow. :)
I'll leave commenting open until 11:59 p.m. EST on Wednesday, January 29, 2014, and will draw one commenter at random. The winner will be announced right here on my blog on Thursday, January 30, and if I'm able to find an email address, I'll be sure to contact the winner as well.
Thanks for joining me today!
Emily
Labels:
blog candy,
chipboard,
chit-chat,
Copics,
DeNami Design,
elegant,
Embossed Elements,
embossing,
Gelatos,
hearts,
love,
monochromatic,
shaped card,
Valentine
Monday, December 23, 2013
Ways With Washi: WREATHS + a Giveaway!
Greetings, DeNami friends! It's time for my December edition of Ways With Washi over on the DeNami Design blog! Today I thought I'd show you a couple of ways that you can use washi tape to build your very own DIY wreath embellishments. Let's take a look!
For my first project, I used two green DeNami washi tapes to build a wreath. I started by punching out two nesting circles from white card stock. Then I used scissors to trim fringe along one side of a long strip of Green Graph Washi Tape and adhered it around the perimeter of the larger circle with the fringe pointing outward. I gave the same fringe treatment to a long piece of Green Stripes Washi Tape and adhered it around the smaller circle. After stacking the smaller fringed circle on top of the larger circle, I filled the center of my wreath with a tiny sentiment from the Christmas Greetings Petit Four stamp set. At this point, I simply added a few red sequins and a loopy bow tied from baker's twine, and my wreath embellishment was done!
![]() |
| Other supplies from the DeNami Design store: Polka Dot Background, Satin Red Versafine Ink |
I love pairing pink with green as a nontraditional color scheme for Christmas! Next up is a larger wreath created with my favorite Christmas color combo. For this wreath, I adhered strips of Pink Stripes Washi Tape and Green Graph Washi Tape around a cardstock ring created with punches. Once all of the tape was securely fastened in place, I used my trusty scissors to trim swallowtail notches in the end of each little banner. Sweet, don't you think?
![]() |
| Other supplies from the DeNami Design store: Rich Cocoa Memento Ink, Arched Sweet Friend, Sugar Cookies Stamp set |
And that brings this Ways With Washi to a close! It's so hard to believe that this is my last DeNami monthly feature for 2013. It's also my last Ways With Washi feature. I've nearly exhausted my list of interesting ways to use washi tape in papercrafting projects! But never fear, I'll be back with a brand-new monthly feature here on the DeNami blog in 2014!
In the meantime, I'd like to offer you the chance to win a roll of washi tape to play with!
GIVEAWAY
I have a brand-new roll of Green Stripes Washi Tape from DeNami Design that I'd love to give away to a reader of this post. Want to be in the running? Just leave me a comment on this post using the word "CHRISTMAS." There's no need to be a follower of my blog to enter, but if you are a follower (or become a new follower!), you can have a second entry in the drawing--just leave me a second comment telling me that you are a follower and how you follow. :)
I'll leave commenting open until 11:59 p.m. EST on Thursday, December 26, 2013, and will draw one commenter at random. The winner will be announced right here on my blog on Friday, December 27, and if I'm able to find an email address, I'll be sure to contact the winner as well.
Thanks for checking out Ways With Washi today!
Emily
Labels:
blog candy,
Christmas,
Copics,
DeNami Design,
friendship,
washi tape,
Ways With Washi
Monday, November 25, 2013
Ways With Washi: GIFT TAGS + a Giveaway!
Hello and welcome, DeNami friends! It's time for my November edition of Ways With Washi! Today we're taking a look at a few ways to use washi tape on holiday gift tags.
For my first project, I used DeNami Red Chevron washi tape to "color in" a stamped ornament image from DeNami. I completely covered the circle portion with strips of washi tape, being careful to line up the pattern. Then I simply used an X-acto knife to trim away the excess washi tape, following the lines of the image. I used a silver Sharpie marker to color in the cap, and glued one end of a paperclip to the back for the ornament's loop. A bit of baker's twine was all I needed to prep this tag for hanging!
Next up is a little tag that uses washi tape in two ways. I started by adhering a strip of Red Chevron washi tape on a piece of cardstock and then punched out a tag shape so that the washi tape was aligned with the bottom of the tag. Then I created a loop for hanging by folding over a strip of Red Stripes washi tape lengthwise and stapling it to the top of the tag. A simple embellishment, built from holly leaves and a red DeNami button, and a stamped sentiment complete this quick and simple tag!
For my final tag, I pressed five different patterns of DeNami washi tape into service to create a diagonal stripy background for a punch art snowman! I used Red Stripes, Green Graph, Red Chevron, Green Stripes, and Red Graph washi tapes--all from the DeNami Design store. Don't they make a festive backdrop for this jolly snow fella?
![]() |
| Additional DeNami Design supplies: Seasonal Faces stamp set, Christmas Greetings stamp set, Large Winter Tree, Ruby Red Boutique Buttons, Classic Twine 3-pack |
That wraps things up for today! I hope you've been inspired to pull out your washi tape to try making a few tags for your holiday gift-giving.
GIVEAWAY
How would you like to win a roll of washi tape of your very own? I have a brand-new roll of Red Chevron washi tape from DeNami Design that I'd love to give away to a reader of this post. Want to be in the running? Just leave me a comment on this post using the word "GIFT." There's no need to be a follower of my blog to enter, but if you are a follower (or become a new follower!), you can have a second entry in the drawing--just leave me a second comment telling me that you are a follower and how you follow. :)
I'll leave commenting open until 11:59 p.m. EST on Sunday, December 1, 2013, and will draw one commenter at random. The winner will be announced right here on my blog on Monday, December 2, and if I'm able to find an email address, I'll be sure to contact the winner as well.
Thanks for stopping by for my Ways With Washi today!
Emily
Labels:
blog candy,
CAS,
Christmas,
DeNami Design,
punches,
snowman,
tags,
washi tape,
Ways With Washi,
winter
Monday, October 28, 2013
Ways With Washi: CHRISTMAS DECORATIONS + a Giveaway!
Hello there, DeNami Friends! It's time for my October edition of Ways With Washi.
I don't know about you, but every year I wish I had more time to make handmade gifts and decorations for Christmas. My problem is that I never start early enough, and once I start thinking, "Oh, maybe I should make something fun for Christmas," it's too late. All my other Christmas preparations are much too pressing, and I run out of time. So this year, I decided to start early. I know that we are still three days away from Halloween, but today I'm sharing a few ideas for jumpstarting your Christmas decorating with washi tape.
So, let's get to it!
For my first Christmas project today, I made a tabletop Christmas tree. This silver-and-aqua beauty stands about 7.5" tall. Can you spot the washi tape?
Starting with a Styrofoam cone, I covered the tree with overlapping circle punches. I chose two coordinating subtly patterned papers, dressing up some with overlapping strips of Musical Notes Washi tape and stamping others with DeNami's Teeny Star Background in silver ink before punching out the circles. I anchored each circle with a straight pin from my sewing supplies stash after glamming up the stock white pinheads with a bit of silver nail polish.
I finished off my tree with a loopy baker's twine bow (from DeNami's Summer Twine 3-pack) fastened to the treetop with a decorative stick pin and a tiny tag stamped with the Noel sentiment from DeNami's Christmas Greetings stamp set.
My second project is a Christmas tree ornament. I started with a clear flat ornament that I picked up for cheap at a local big box crafts store. Then I cut out poinsettia petals from Red Stripes Washi Tape and leaves from Lime/White Dots Washi Tape and adhered them to the face of the clear ornament. Can you guess how I made the petals and leaves look so uniform? I stamped a petal from DeNami's Whimsical Garden cling set on cardstock to use as a pattern for trimming my washi tape flower parts. A cluster of amber rhinestones creates a realistic-looking center to my poinsettia. I finished my ornament by stuffing it with some multi-color DeNami Iridescent Shredds for a bit of sparkle.
It's beginning to look a lot like Christmas around here! I hope you picked up a few ideas to use in your own Christmas decorating this year
GIVEAWAY
How would you like to win a roll of washi tape of your very own? I have a brand-new roll of Black/White Dots Washi Tape from DeNami Design that I'd love to give away to a reader of this post. Want to be in the running? Just leave me a comment on this post using the word "DECORATE." There's no need to be a follower of my blog to enter, but if you are a follower (or become a new follower!), you can have a second entry in the drawing--just leave me a second comment telling me that you are a follower and how you follow. :)
I'll leave commenting open until 11:59 p.m. EST on Wednesday, October 30, 2013, and will draw one commenter at random. The winner will be announced right here on my blog on Thursday, October 31, and if I'm able to find an email address, I'll be sure to contact the winner as well.
Thanks for joining me today for some more Ways With Washi!
Emily
Labels:
blog candy,
Christmas,
DeNami Design,
gift ideas,
home decor,
washi tape,
Ways With Washi
Monday, September 23, 2013
Ways With Washi: FLOWERS + a Giveaway!
Good morning, DeNami friends! Can you believe that autumn has officially arrived? I can't believe that it's already time for my September edition of Ways With Washi! I thought that this time around we could take a look at using washi tape to create different styles of flower embellishments. Here, let me show you what I mean . . .
For my first project, I used strips of DeNami Red Stripes washi tape to create a cheery floral focal point for a clean and simple encouragement card. I started with long-ish strips of washi tape that I folded over on themselves, being careful to leave some adhesive exposed at one end. Then I used scissors to round one end of each strip and adhered them (using each strip's exposed adhesive tab) around a circle punched from cardstock to form the blossom. The last step was to add a pretty decorative brad in the flower's center and attach it to my card!
![]() |
| DeNami Products: Hang In There, Solid Block Border, Toffee Versafine Ink, Onyx Black Versafine Ink |
Next up is a loopy washi tape flower. For this embellishment, I turned to DeNami Orange Stripes washi tape for the job. To make the petals for this beauty, I folded long strips of washi tape in half lengthwise before doubling them over and adhering them to a punched cardstock circle. I anchored everything with a pretty pearl brad in the center.
![]() |
| DeNami Products: Thoughtful Greetings stamp set, Onyx Black Versafine Ink |
Finally, I pressed some DeNami Yellow/White Dots washi tape into service for a sunshiny daisy. I used an approach similar to the one I used for my first card, but trimmed each washi tape petal to a point this time around. For the daisy's center, I stamped a Circle Scallop on magenta cardstock, cut it out, and finished it off with baker's twine tied through a DeNami boutique button. I covered some wire with Lime/White Dots washi tape for a stem. And because you are so sharp, I'm sure you spotted some more Lime/White Dots washi tape used for the leaves and grass ;).
![]() |
| DeNami Products: Sending You Sunshine, Circle Scallop, white cardstock, Tutti Fruitti Boutique Buttons, Confetti 3-pack baker's twine, Onyx Black Versafine Ink |
GIVEAWAY
How would you like to win a roll of washi tape to try making some pennants and banners for yourself? I have a brand-new roll of Orange Stripes Washi Tape from DeNami Design--the same tape that I used on today's second project--that I'd love to give away to a reader of this post. Want to be in the running? Just leave me a comment on this post using the word "AUTUMN." There's no need to be a follower of my blog to enter, but if you are a follower (or become a new follower!), you can have a second entry in the drawing--just leave me a second comment telling me that you are a follower and how you follow. :)
I'll leave commenting open until 11:59 p.m. EST on Wednesday, September 25, 2013, and will draw one commenter at random. The winner will be announced right here on my blog on Thursday, September 26, and if I'm able to find an email address, I'll be sure to contact the winner as well.
I'm so glad you dropped by for a little slice of bliss today!
Emily
Subscribe to:
Posts (Atom)